Saturday, November 20, 2010

Southwestern Chicken Wrap


I was at the supermarket the other day and found myself wandering down the chips aisle.  I’m usually on a tight schedule, so I tend to get into a routine of grabbing the same things on the shelves.  I went to reach for my favorite honey wheat pretzels when ONE jar of salsa caught the corner of my eye.  It was THE salsa that I had been looking for all semester!  It was meant to be, I’m convinced.  I had tried it once at my cousin's house and fell in love, but have been unable to find it ever since.  This amazing creation is a corn and black bean red pepper salsa, and it is the best thing I have ever dipped a chip in. 

Of course, it was ridiculously expensive, as most of the best things in life are.  It was $5.99…waaay more than I was willing to spend on a jar of salsa.  On top of that, I would have to buy chips to go with the salsa.  The thought of passing it up was heartbreaking, so I resolved to buy the salsa but skip on the chips…I could find another use for the tasty dip!  I was forced to be creative, so I came up with a southwestern wrap in which the salsa would be the star of the show!

You can try this with any kind of salsa, but I would recommend the Desert Pepper Trading Company Corn Black Bean Red Pepper Salsa.  It really makes the dish!

Southwestern Chicken Wrap
Original recipe and photos by Culinary Chronicles of a College Kid.blogspot.com

Serves 1

  • About 3 tbsp salsa
  • ½ can chicken breast (yes, they sell other things in cans besides tuna and sardines)
  • 1/3 cup cheddar cheese (add more if you want!)
  • 1 tortilla
  • splash of lime juice to bring out the flavors in the salsa (optional)

    Woops, forgot the tortilla!
Mix the salsa with the chicken in a small bowl.  Add more if you prefer.


Place the mixture in the microwave for 1 minute, in 30 second intervals.  Place on the tortilla and top with cheese.


Put the tortilla in the microwave for another 30 seconds, or until the cheese is melted.  Fold the tortilla by folding the ends in first and then rolling the rest accordingly, as show in the picture below.
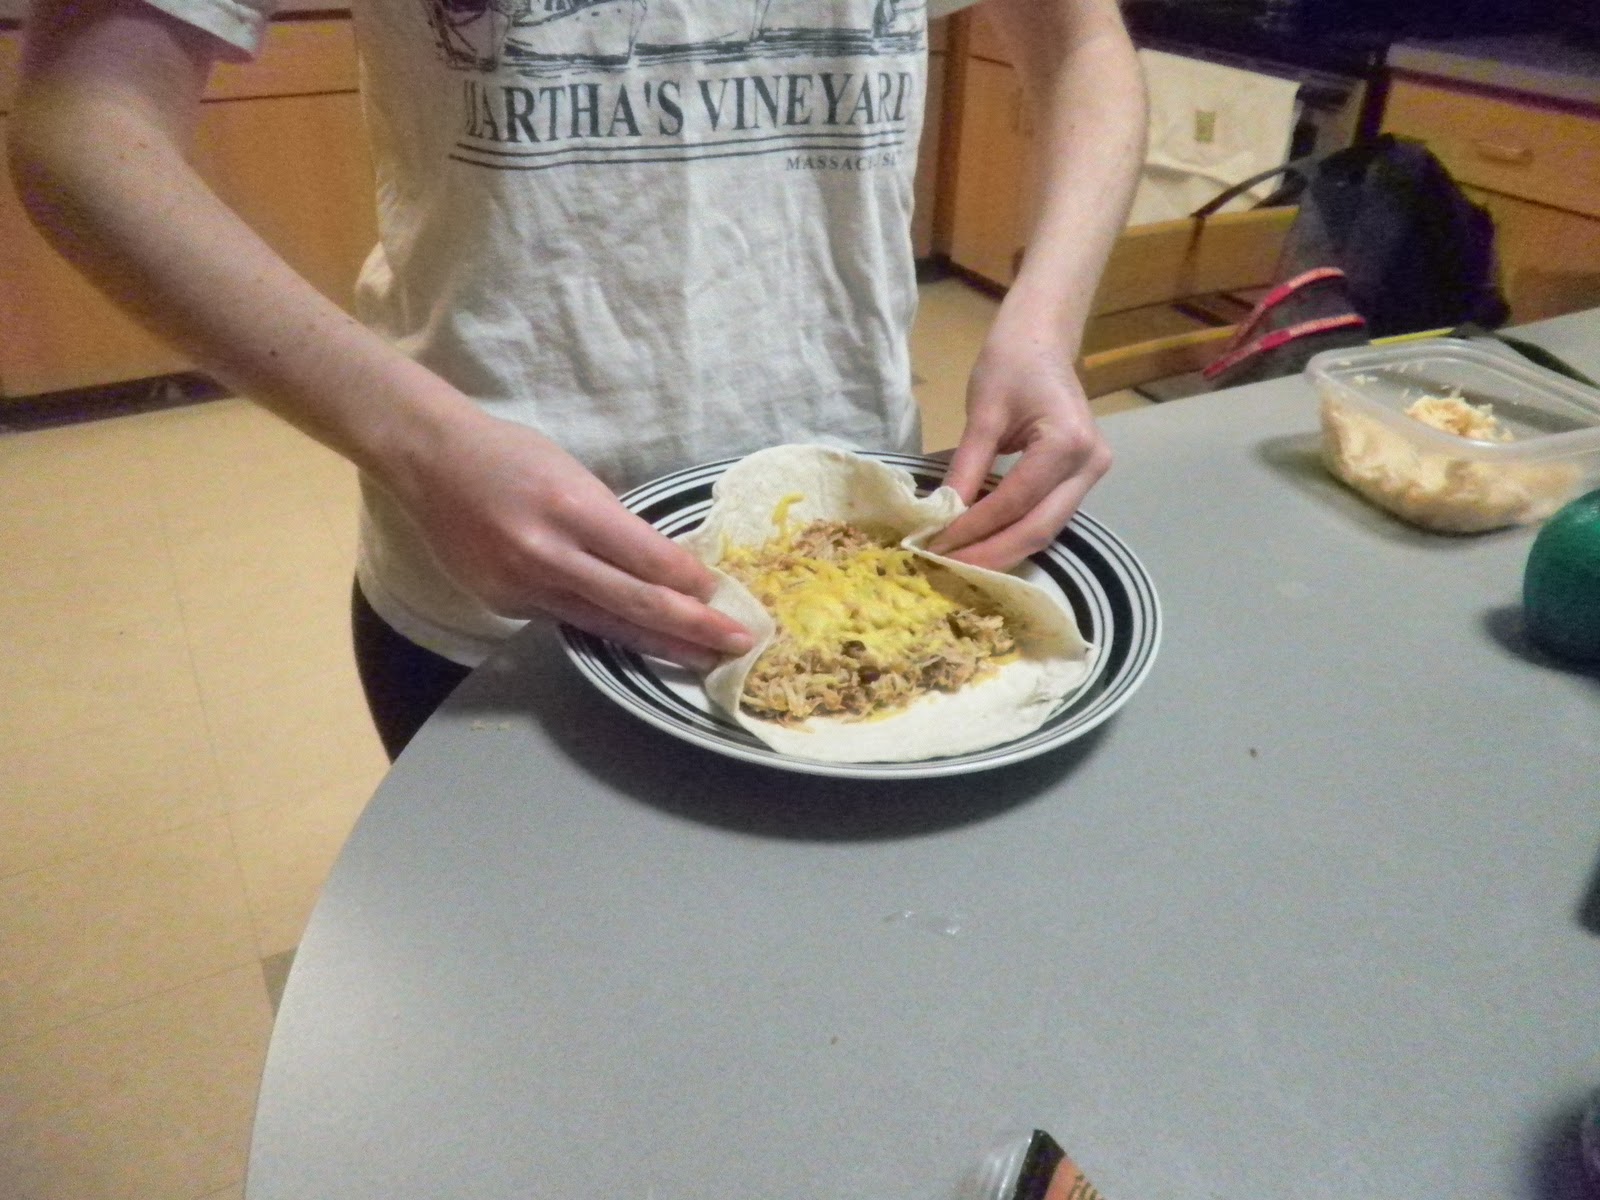


Cut in half and enjoy!


I love this wrap – it was super easy and full of flavor.  It tasted really authentic, like I was at a real Mexican restaurant!  And the best part is, you don’t have to slave over cooking the corn, tomatoes and beans yourself…it’s all prepared in the salsa!

Total time: 10 minutes 

Wednesday, November 17, 2010

White Chocolate Pumpkin Muffins


As the fall season is slowly starting to fade into winter (which is hard to believe here in Poughkeepsie, as the weather is almost 60 degrees today), I decided to make one more seasonal recipe with a can of pumpkin puree and white chocolate chips that I had leftover from experimenting for the Today Show contest.  Muffins are the one breakfast food that I had yet to prepare for my morning capping class, so I decided to make pumpkin muffins with a little extra sweetness from the white chocolate chips.  They came out delicious…almost too delicious to eat for breakfast!  Everyone in class loved them and I guarantee you will too!


White Chocolate Pumpkin Muffins
Adapted recipe and photos by Culinary Chronicles of a College Kid.blogspot.com
Original recipe by For the Love of Cooking.net


Makes 12 muffins

  • 1 2/3 cup flour
  • 1 cup sugar
  • 1 tsp cinnamon
  • 1 tsp nutmeg
  • 1 tsp baking soda
  • ¼ tsp salt
  • ¼ tsp baking powder
  • ½ cup unsalted butter, melted
  • 2 eggs
  • 1 cup pumpkin puree
  • 1 tsp vanilla extract
  • ¾ cup white chocolate chips

Preheat the oven to 350 degrees and coat a muffin tin with cooking spray.  You could also use paper muffin liners, if you prefer.

Mix all of the dry ingredients (flour, sugar, cinnamon, nutmeg, baking soda, salt, and baking powder) in a bowl.

In a larger bowl, combine the wet ingredients (melted butter, eggs, pumpkin puree, and vanilla extract).  Slowly add the dry ingredients to the wet ingredients, making sure to mix thoroughly as you go.  Once the dry and the wet ingredients are completely combined, fold the white chocolate chips into the batter.


Fill the muffin cups with batter so that they are ¾ of the way full.  The original recipe called for 15-17 minutes in the oven, but I found that they needed to cook for at least 20 minutes.  Test them yourself by placing a toothpick into the center of a muffin.  If it comes out clean, they are done!

Let the muffins sit in the tin for at least ten minutes before taking them out and letting them cool for an additional 5 minutes on a cooling rack.  Enjoy!


These will definately satisfy your hunger and your chocolate cravings, but if you have a ridiculous sweet tooth that never seems to be completely satisfied, like me, try it with some applesauce, whipped cream, and cinnamon!

Yesterday's breakfast

Make them quick before the pumpkin season is over!

Total time: 40 minutes


Tuesday, November 16, 2010

Oatmeal-Crusted Chicken Fingers


Chicken fingers are a classic.  Breaded, fried, chicken can never be wrong, especially for college kids.  For this reason, I am giving you a quick recipe for chicken fingers that can easily be made at home.  These are great because all you need is a grand total of FOUR ingredients, besides the basic salt and pepper.  Using oatmeal instead of bread crumbs, and cooking spray rather than oil makes them a lot healthier too!

Sorry in advance for the lack of pictures…my camera is out of commission.

Oatmeal-Crusted Chicken Fingers
Adapted recipe and photos by Culinary Chronicles of a College Kid.blogspot.com
Original recipe by Cooking Light, September 2006

Serves 4

  • 1 cup oats
  • ¾ cup grated parmesan cheese
  • 1 tsp chopped thyme
  • ½ tsp salt
  • ¼ tsp pepper
  • 1 pound chicken breasts, sliced

Preheat the oven to 450 degrees.  Place the oats in a food processor and pulse until ground.  Add the parmesan, thyme, salt, and pepper, and pulse again to combine.  Pour into a bowl.

Coat the chicken tenders in cooking spray, then place in the bowl of ground oats.  Coat the chicken generously on both sides with the oats.  Place each coated chicken strip on a cooking sheet that has been greased with cooking spray.  After they have all been dredged in the oat mixture, place the sheet in the oven for about 15 minutes.  Flip them over and cook for about 3-4 more minutes on the opposite side.  Remove and let them cool before enjoying!

As you can see from the picture, I reduced the proportions to serve only one person.  The original recipe serves four.

The sweetness from the oats complimented the raisins in the couscous really well- a perfect match!  I also made myself a quick honey mustard dipping sauce using Dijon mustard and honey.  Combine equal parts of each (about a tablespoon of mustard and a tablespoon of honey for one serving) and voila!

Total time: 20 minutes

Sunday, November 14, 2010

Chickpea and Raisin Couscous


I know couscous is not typically found in a college setting, as most college kids probably have never even heard of it before.  But that doesn’t mean it can’t be made in a dorm or college kitchen!  Couscous is similar to pastina, or very tiny pasta, for those of you who are still confused.  It originated in North Africa and is now popular in all parts of the world.  There are so many different combinations of vegetables, fruits, and spices that you can add to couscous, which is what makes it so fun to cook with.  Also, it is very easy and quick to make.

I found this particular recipe in one of my mom's old Everyday Food magazines, and decided it was just what I needed to change up my diet a little bit.  I don’t know about you guys, but I find myself making the same meals numerous times throughout the week, so I felt that this was a different, yet not too overwhelming way of deviating from the norm. 

Chickpea and Raisin Couscous
Adapted recipe and photos by Culinary Chronicles of a College Kid.blogspot.com
Original recipe from Everyday Food, March 2006

  • ½ cup couscous
  • 1 can (15.5 oz) chickpeas
  • 1/3 cup raisins
  • 1 tsp olive oil
  • 1 cup water
  • ½ tsp salt
  • 1/4 tsp pepper

In a small pot, combine chickpeas, raisins, oil, water, salt, and pepper, and bring to a boil.  Once this has reached the desired temperature, stir in the couscous and cover the pot.  After a few minutes (3-4), check on the couscous and stir to make sure that none sticks to the bottom of the pot.  When all water is absorbed and couscous is fluffy, take the pot off of the heat and let it sit for a few minutes to cool.  Enjoy!


Hopefully the fact that this dish is somewhat exotic, compared to most college cooking, doesn’t scare you guys away.  Try something new!  I don’t think this recipe will disappoint.

The recipe makes enough for four, so I saved the leftovers and had a bit each night.  It’s delicious AND keeps you full all week!

Check back soon to see what main course I paired this with…

Total time: 10 minutes

Saturday, November 13, 2010

Oatmeal Raisin Breakfast Cookie


Yep, you read right…cookies for breakfast!  This oatmeal raisin cookie is one of the best discoveries I have found while surfing the internet from food blog to food blog.  It’s a healthy, quick, hearty, and delicious dessert that you can eat for breakfast!  I know, it sounds too good to be true, right?  I had my doubts when I was testing it out, too.  But it turns out that it really is that great! Try it out and see for yourself!

Oatmeal Raisin Breakfast Cookie
Adapted recipe and photos by Culinary Chronicles of a College Kid.blogspot.com
Original recipe by Carrots 'N' Cake


·        1/4 cup oats
·        1/8 cup liquid egg whites
·        2 tsp brown sugar
·        2 tsp flour
·        1/4 tsp vanilla extract
·        1/4 tsp baking powder
·        1 tbsp raisins
·        Cinnamon to taste


Combine all of the ingredients in a microwave-safe bowl.  Flatten the batter at the bottom of the bowl into a cookie shape. 


Place in the microwave for 45 seconds and allow it to cool for a minute or two before enjoying.  Yummmm cookies for breakfast :)

This recipe would also be great if you are looking for a quick snack before heading out to class.  You could even substitute chocolate chips for raisins, if your sweet tooth is acting up!

Total time: 3 minutes

P.S. Here's a recent picture I received from a friend who tried the linguini with turkey sausage.  I'd love to know what everyone thinks of my recipes, so please comment or send pictures!

Direct quote: "Muy delicioso! I can't wait to try another recipe!"  Haha :)

Thursday, November 11, 2010

Oreo Ice Cream Sandwiches


I present to you the easiest, most basic recipe that I will probably ever post: Oreo ice cream sandwiches.  As you can most likely infer, this dessert is an Oreo stuffed with ice cream.  Very easy, which is just the kind of treat that college kids want to enjoy after spending the time to cook dinner.

Oreo Ice Cream Sandwiches
Original photos and recipe by Culinary Chronicles of a College Kid.blogspot.com

  • Oreos
  • Mint chocolate chip ice cream (vanilla or cookies and cream work well too, whatever you prefer!)

Take the ice cream out of the freezer and let sit for at least five minutes so that it is thawed and slightly melted.  Twist open an Oreo (like they do in the commercials) and place a tablespoon sized scoop of ice cream on one half of the cookie.  Sandwich the other half of the cookie on top of the ice cream.  Repeat the process with as many Oreos as you would like to make.  Immediately place in the freezer for at least ten minutes before enjoying.


Sometimes, the simplest treats are the best.  Believe me on this one.  I’m on my way to the freezer now for some leftovers…

Total time: 3 minutes prep plus 10 minutes in the freezer


Monday, November 8, 2010

Recipe of the Week: Linguini with Turkey Sausage, Tomatoes, Mozzarella, and Spinach


Seeing the mall already decorated for Christmas, and advertisements on ABC Family for the “Countdown to 25 Days of Christmas” has really started to get me in the mood for the season’s festivities.  I know that many get annoyed by the premature holiday décor and music, but I’ll admit I can’t get enough of it.  My favorite time of year can’t come soon enough! 

With all of this excitement come thoughts of holiday traditions and, of course, lots of food.  I haven’t had a home-cooked meal in a few weeks, and the anticipation for holiday meals with the family has gotten me a little homesick.  So, I decided to prepare an Italian meal that resembles something exactly like what my mother would make on a Sunday night.  This pasta dish was just what I needed to hold me over until I go back to New Jersey for homecooking over Thanksgiving break.  This is my version of “comfort food,” and hopefully it will cure your homesick cravings too!

Linguini with Turkey Sausage, Tomatoes, Mozzarella, and Spinach
Adapted recipe and photos by Culinary Chronicles of a College Kid.blogspot.com
Original recipe by For the Love of Cooking.net


Serves 4-5

  • 9 oz linguine
  • 1-2 tsp olive oil
  • 5 turkey sausage, removed from casings
  • 4-5 cloves of garlic, minced (finely chopped)
  • 1 cup of chicken broth
  • 1 tsp dried oregano
  • 1 ½ cups of grape tomatoes, cut in half
  • 1 ½ cups of spinach (original recipe called for arugula but I had spinach leftover from earlier in the week, and it tasted great!)
  • 10-12 mozzarella balls, cut in half
  • salt and pepper to taste

First, place a large skillet over medium heat and coat the bottom of the pan with the olive oil.  Then, place a large pot of water over medium heat and wait for it to come to a boil for your pasta.  Remove the casings from the sausage and use your hands to form small balls of meat. 

Cook the sausage balls in the skillet for 4-5 minutes, while constantly turning them with a spatula so that they are cooked thoroughly.  Add the garlic and tomatoes to the skillet and continue stirring for about a minute or so.  Then, add the chicken broth, oregano, and a pinch of salt and pepper to the skillet.  Stir and let sit for about 8-10 minutes. 

Add the pasta into the boiling water.  This should be ready at about the same time as the sausage and tomatoes.  If you aren’t sure whether it is done cooking or not, you can always use the old Italian trick of throwing it against the wall.  If it sticks, it’s done!

Of course, we would never turn down a food fight.  It's cooked!

After your pasta has stuck to the wall, drain the rest of it and place in a large bowl.  Pour the sausage and tomato mixture over the past and mix well.  Add the mozzarella and spinach and mix again.  Enjoy!


As I mentioned earlier, this meal definitely satisfied the Italian in me that has been living off of grilled cheeses and cookies for the past week.  Try it out if you miss your mother’s home-cooking as much as me :)


Total time: 30 minutes